In the Classroom
Working with Data in the Classroom

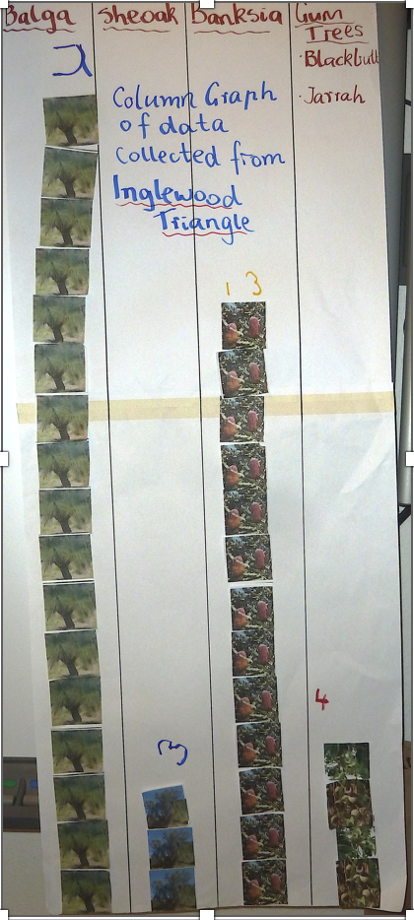
Tree Data
Activity
Using Science Notebook, Record Trees Counted into a Master Sheet:
There may be obvious differences, as the counts represent the individuality of the students. It may warrant some discussion if there is wide discrepancy.
• a student may have difficulty in identifying the tree
• some students are overly enthusiastic (or did they lose concentration?)
However, scientists also arrive at different results, during their experiments. One method is to repeat the experiment many times under the same condition and calculate the mean (average) of the results, and an acceptable variation.
For students in Years 1-3, a middle number (or median) of all counts will provide a good assessment. See: https://www.mathsisfun.com/median.html
Activity
Find the Middle Number:
Using the example from Rosalie Primary School, the counts for gum trees are arranged in a line, as follows:
40, 48, 26, 27, 29, 45 ,40, 36, 97, 30, 16, 22, 78, 31, 18, 109, 25, 106, 35, 11, 106, 98.
Rearrange the counts in ascending order as follows:
11, 16, 18, 22, 25, 26, 27, 29, 30, 31,35, 36, 40, 40, 45, 48, 78, 97, 98, 106, 106, 109
Counting inwards evenly from both sides, there are 2 middle numbers - 35 and 36.
The median value here is halfway between 35 and 36 (35.5), and expressed as 36.
You will see from the example, that the median is 12 trees less than the calculated average.
The median corrects for the students’ counts that are over-enthusiastic and best represents the actual number of trees.
From Jenny Russell, Year 1 teacher at Woodlands Primary School:
1. Have students write the number of trees they counted on a sticky note.
2. Have each student stick their note to the class screen, in a line.
3. The teacher (with help?) rearranges the numbers into numerical order, from the least to the highest.
4. Ask 2 students to stand at either end of the line, and remove a note, one at a time, and at the same time.
5. When students arrive at the middle of the line, the single note left will be the middle number (or median).
6. If 2 notes are left, add numbers, and divide by 2.
7. Repeat for each tree counted
8. Enter into a Class Summary Table, with the ID of each tree, and its median number.
Construct a graph
This may be a pictograph, or a sticker graph.
• Students denote the name of each tree along the x-axis (its name, or picture)
• Record the median number from the Class Summary Table using the y-axis.
The objective here is for students to interpret a number from a shape, an important conceptual leap.

Sticker Graph Yr2. Photo, St Emilie’s Catholic Community School
Pictograph Yr K, Perth College
Activity
Look for Animals, and Where they Live:
1. Have students draw a tree they counted. Refer to Bush Library. Label correctly and display on Wall space. These may include specialist art teacher, or interested parent.
2. Make a leaf rubbing with a leaf gathered from the Field site. Place the leaf under a piece of paper and rub a crayon (or oil pastel) over the leaf.
3. Label leaf with its tree name, match with its tree of origin, and affix to the Wall display.
Further work by students (flowers, seeds, pollen cut-outs and litter, together with any animal association) will be added to the model.

Habitat Model, Yr 1 Woodlands PS
Activity
Why do we Need Trees?:
Discuss the topic with students.
• Trees provide many things, what are they? (shade, shelter, wood, place for bird’s nest, etc.) These could be listed in the science notebook.
• Introduce the concept that leaves produce oxygen, asking students if they have heard of the word oxygen? Place on WORDWALL.
• Help students to pronounce OX – EE – GEN.
For discussion,
• Do students know that we breathe in oxygen?
• Do they know where oxygen is? It is in the air, as a gas (WORDWALL).
• Do they know where oxygen comes from?
• Inform that the leaves on trees make oxygen. It passes out of every leaf, through very tiny holes!
MAKE AN OXYGEN TREE
1. Have students prepare, ‘oxygen’ tags. Cut circles from stiffened white paper (or thin cardboard) about 3cm diameter. These look like a bubble of air, but represent an atom of oxygen.
2. Punch a small hole near the edge of the circle
3. Thread about 10cm string through the hole, tying the 2 ends loosely close to the paper, to make the tag.
4. With black, draw a large O on each tag. (Oxygen begins with an ‘O’.)
5. Acquire a large potted plant and place inside the doorway of the classroom, or under the window. Plants need light to grow.
6. Students take turns to water the plant (suggested as once weekly), each time, fastening 1 or 2 ‘oxygen’ tags to leaf stems.
7. Over the course of 8-10 weeks, the plant will have an impressive output of ‘oxygen’

See Connected Classrooms Activity 4: Ephemeral and Activity 5: Writing Bird Sounds.
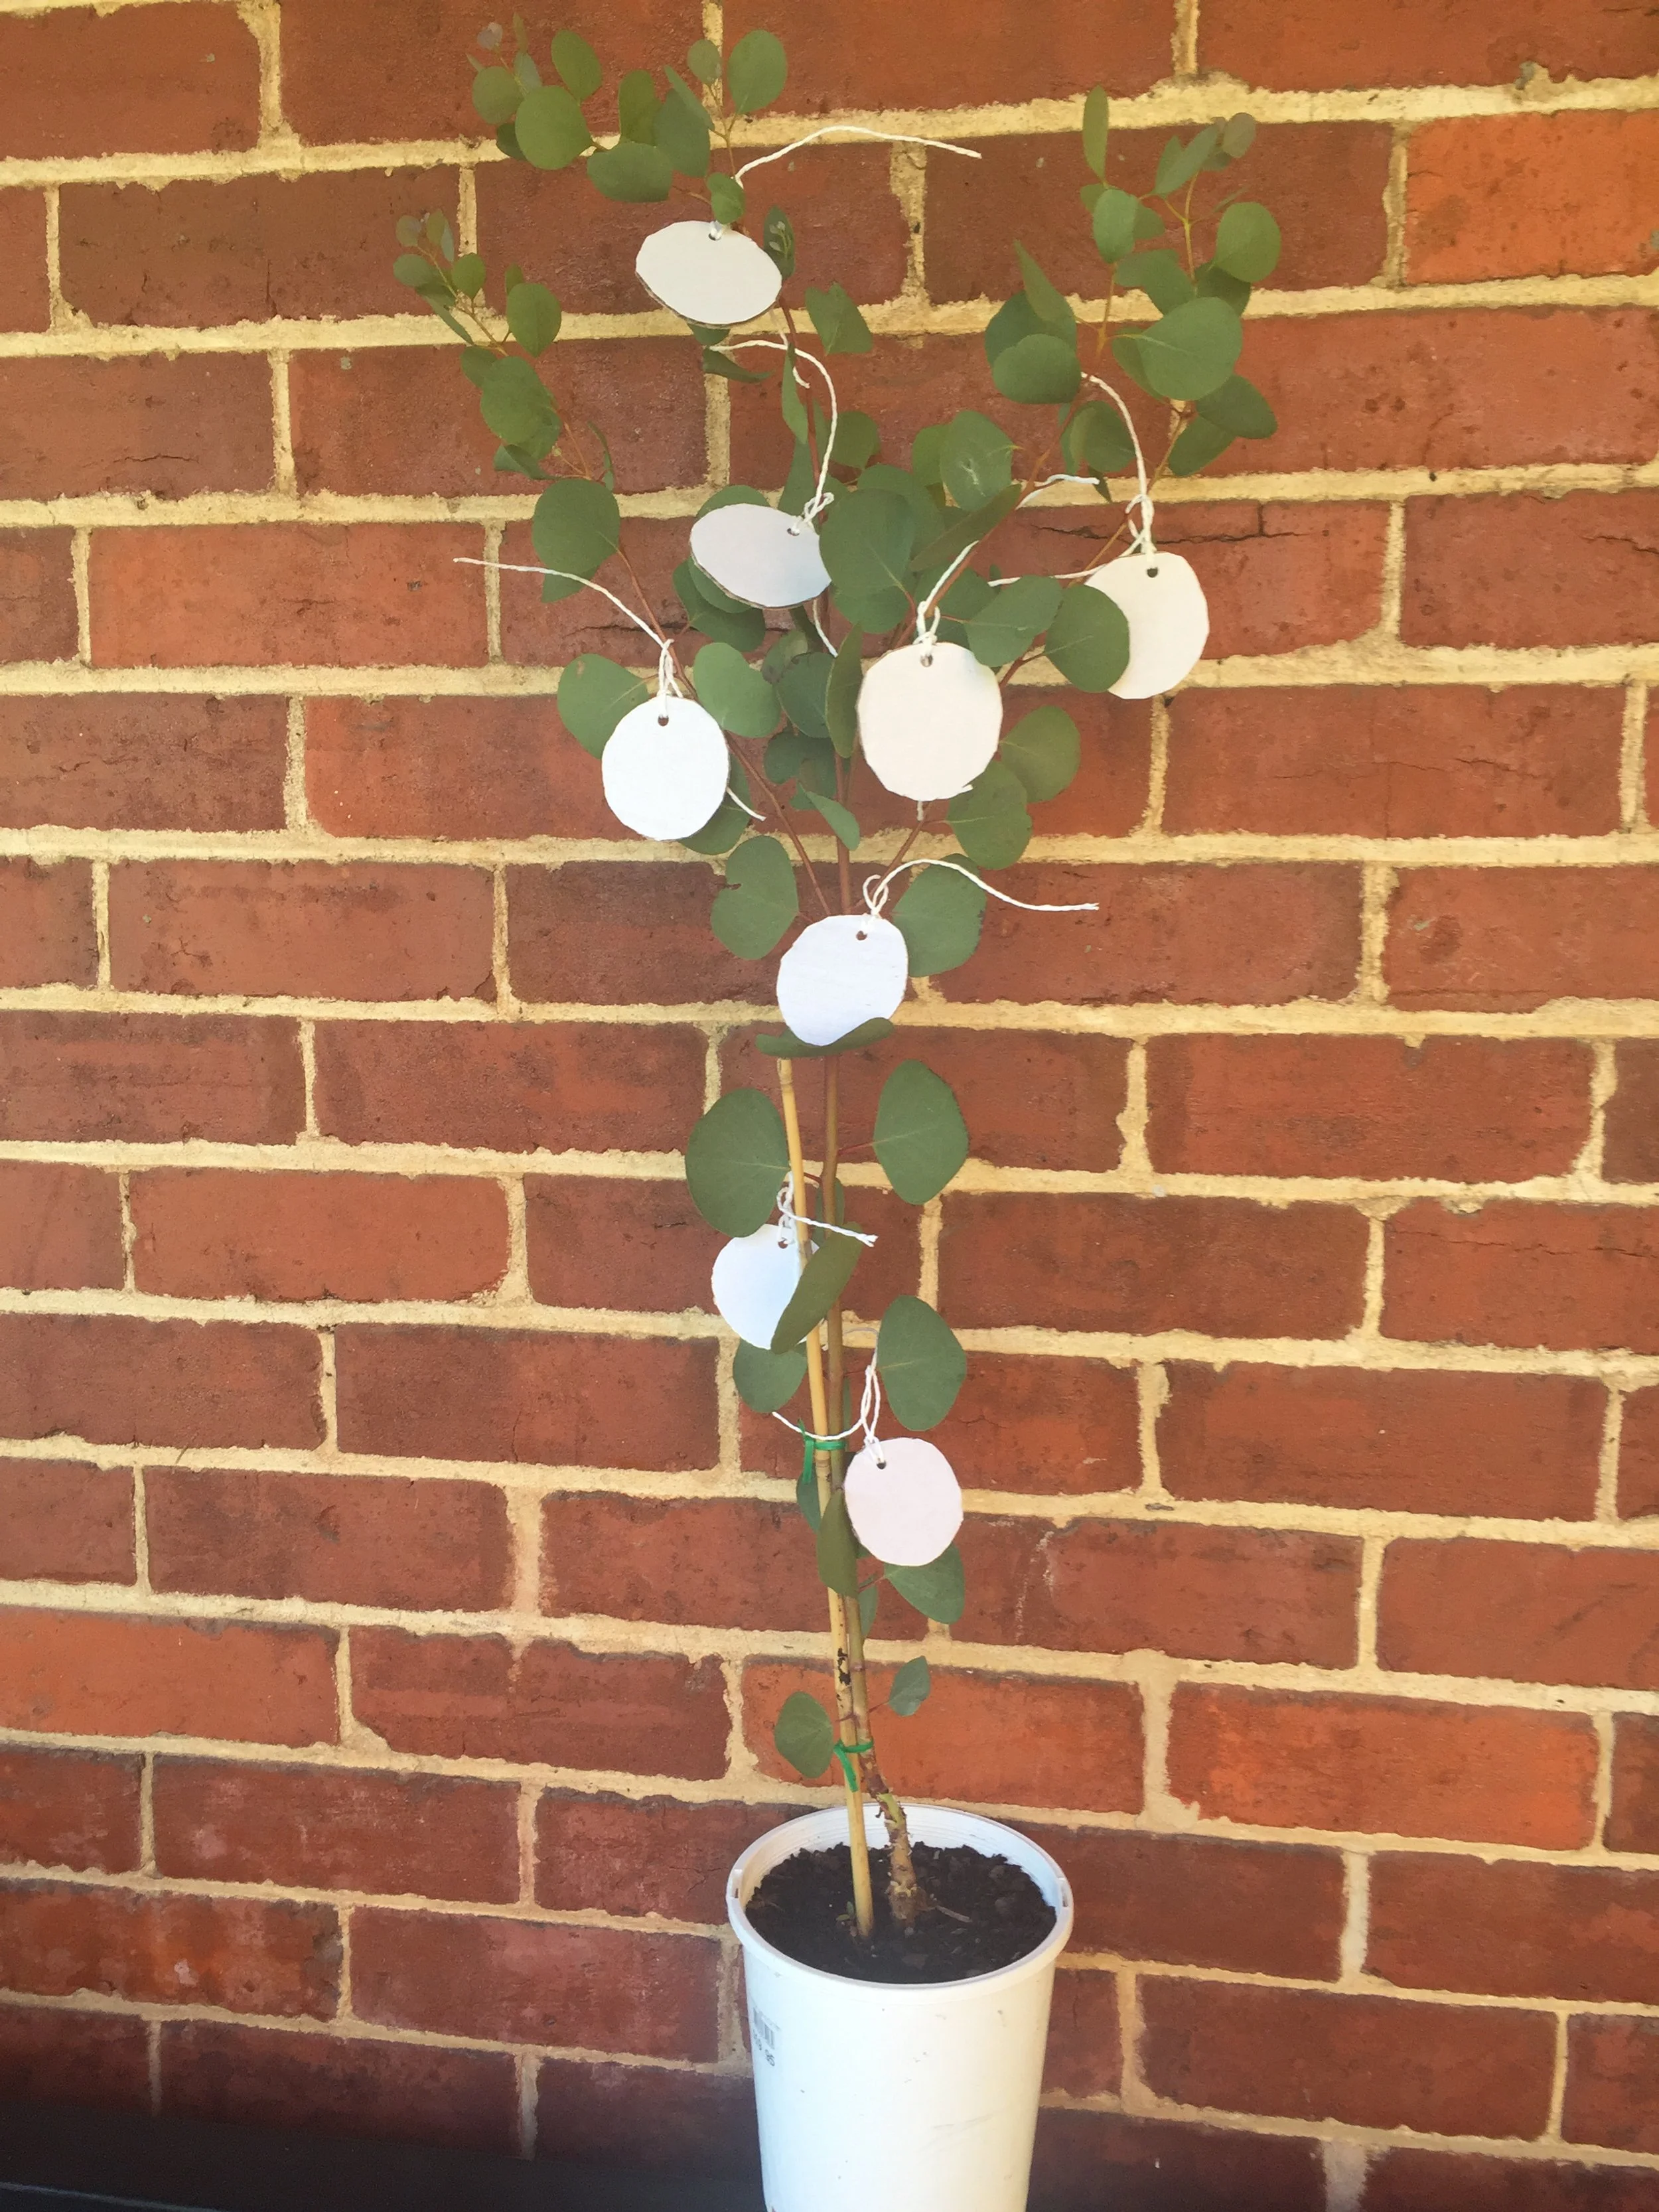
‘Oxygen’ Tree