Adaptations
Adaptations to an Arid Environment
How Water Moves in Plants
Background
• Plants need water to maintain water pressure inside cells (called turgor) in order to maintain structure and cell growth. Most water passes out from the leaves (transpiration) by way of holes (called stomata) in the leaf’s under-surface; only a very small amount is used in the synthesis of food.
• With the passage of dry air across the stomata, a water gradient is set up. Loss of water from stomata and their surrounding cells, causes a decrease in the pressure of the water (hydrostatic pressure) in the water channels in the leaf. This decrease in hydrostatic pressure acts like a stretched spring, creating a negative pressure at the leaf end, pulling columns of water up through xylem channels in the stem.
• The continuity of the water columns remains intact due to two forces. Water molecules are composed of 2 hydrogen atoms (which are slightly positive) and an oxygen atom (which is slightly negative). This means that each end of the water molecule is attracted to the opposite end of another water molecule. As a result, water molecules are cohesive. Water molecules also stick well to other substances, called adhesion. If this force is stronger than cohesive forces, then water spreads out, sticking to the other substance.
• In a very narrow channel, like a capillary tube, or a conducting tissue in a plant stem, the adhesive forces are stronger than the cohesive forces between the water molecules themselves, and water is drawn upwards, against the force of gravity.
• Once this pull (it has been called ‘transpiration pull’, or ‘capillary action’) reaches the roots, water is drawn in through the root cell membranes, either by diffusion (passive absorption) or by osmosis (see Glossary).
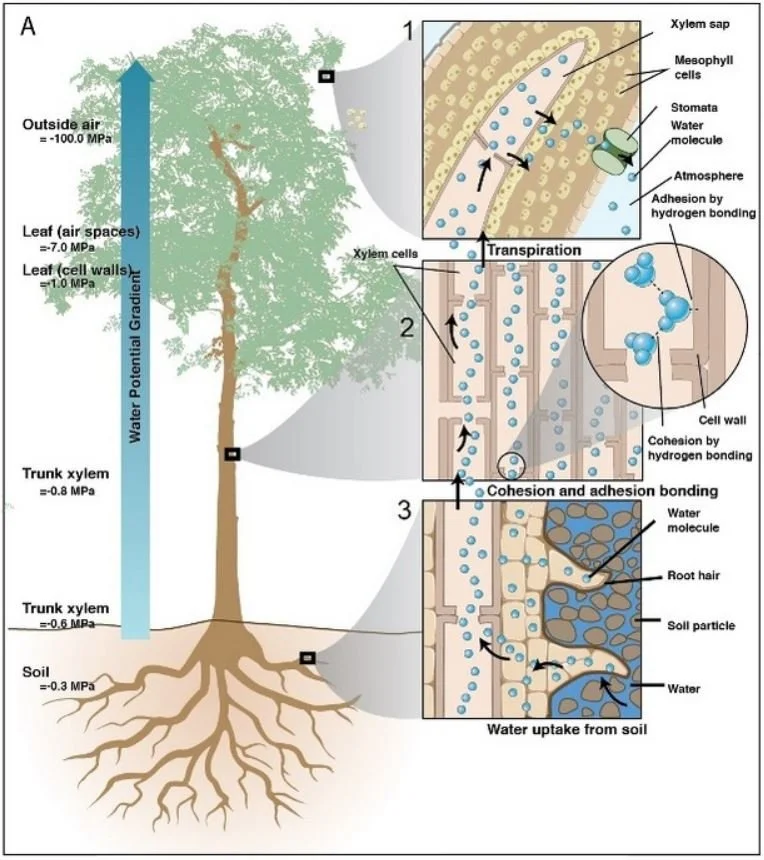
How water Moves in trees. Diagram Nature Education
Activity
Understand the Structure of Plant Tissues:
Show ‘Professor Dave Explains’ on the YouTube clip:
https://www.youtube.com/watch?v=M-qDzKG3RB0
This provides an excellent outline of the different cells and tissues that make up a plant. It also explains the forces that control the passage of water through the tissues, as demonstrated in osmosis, transpiration pull and capillary flow.
• Have students draw diagrams of the various tissues, leaf and leaf veins, stem, root, and outline their function for transporting water to the leaf cell.
Activity
Demonstrate Osmosis:
From: https://www.homeschool.com/blog/2023/01/homeschool-science-gummy-bear-osmosis/
AIM
To demonstrate the movement of water molecules from a solution with a high concentration of water molecules to a solution with a lower concentration of water molecules, through a cell’s partially permeable membrane.
MATERIALS
• Gummy bears (available from Supermarkets)
• A small glass for each liquid
• Solids Baking soda Sugar Salt
• Liquids Tap water, salt water, sugared water Soda Vinegar Milk
• Paper towels
• Kitchen scale
• Ruler
• Paper/Pen
• Timer
METHOD
1. Have 6 small glasses, each one labelled for a different kind of liquid (tap water, salt water, sugar water, milk, vinegar, soda).
2. Add a half cup of water to the tap water glass.
3. Add a half cup of water and 1 tablespoon of salt to the saltwater glass. Stir the salt until it is dissolved.
4. Add a half cup of water and 1 tablespoon of sugar to the sugar water glass. Stir until the sugar is dissolved.
5. Add a half cup of water and 1 tablespoon of baking soda to the baking soda water glass. Stir until the baking soda is dissolved.
6. Add a half cup of vinegar to the vinegar glass.
7. Add a half cup of milk to the milk glass.
Teacher note - Any of these liquids can be omitted or changed according to your preference.
1. Weigh each gummy bear and record results.
2. Add one gummy bear to each glass of liquid.
3. Set a timer for 12 hours.
4. After the timer goes off, remove each gummy bear from its solution, pat dry, weigh, measure, and compare to a new gummy bear.
5. Discuss the results and download the WORKSHEET from: https://www.homeschool.com/wp-content/uploads/2023/01/gummy-bear-osmosis-printable-lab-notes-1.pdf
Questions to ask
• Why did the gummy bears grow in the liquid?
• Which liquid grew the gummy bears the most?
• Which gummy bear changed the least?
• What caused these differences? (the different solutes in each liquid).
• What did you learn from this experiment? Can you explain the concepts of diffusion, equilibrium, osmosis and isotonicity?
Activity
Demonstrate Transpiration:
AIM
To demonstrate the passage of water from leaves.
MATERIALS
• Plastic bags
• Ties
• Schoolyard tree
• Large-leafed garden plant, for comparison
METHOD
1. Choose leaves at the end of a small branch.
2. Enclose as many as possible inside the plastic bag,
3. Close the plastic bag around the leaves by tying it tightly to the branch, making sure water vapour cannot escape.
4. Leave for seven days, or until measurable water has accumulated in the bottom of the bag.
5. If a large-leaved garden plant is available, it serves as a comparison.
6. Carefully pipette the water into a small measuring cylinder, and record the volume.
7. Count the number of leaves in the bag.
8. You may be able to calculate volume water transpired per leaf.
9. Write up the experiment, expressing results as the volume of water transpired by the plant (per leaf) over the time of collection. If a comparison is made, conclude possible reasons for differences in the volume of water transpired.
Demonstrating transpiration, Mt Pleasant PS, Photo Stephen Clee
Activity
Demonstrate Capillary Action:
Revise how water moves in plants.
AIM
To demonstrate the passage of water upwards in leaf stems.
MATERIALS
• A head of celery (stems with leaves)
• A thin slice of celery (called a cross-section)
• 2 jars, or plastic water cups
• Water
• 2 different food dyes
• Microscope
METHOD
1. Examine the cross-section of celery under the microscope. Draw and describe what you see.
2. Half fill each water container (jar) with water. Add one food colour to one container and the other food colour to the second container.
3. Split the celery stalk in half, up to the leaves. Place 1/2 of the stem in one water container and the other half in the second
4. Label the containers with your name and put them in a safe place
5. Predict how you think water travels up the celery stem (the capillarity forces of adhesion and cohesion) and what you expect to see after the coloured dye has had time to move up the stem to the leaves
6. Examine the next day; the coloured water should have moved up the celery stems to the leaves.
7. Draw and describe what you see, explaining your observations.
8. Cut a thin slice of celery from each of the different coloured stems, observe each slice under the microscope, draw and describe what you see.
9. Explain why only some parts of the stem have changed colour, what do you think these parts are?
How Plants Adapt
Show PowerPoint – All about leaves (TOOLBOX)
Flowering plants have been evolving for about 150 million years; time enough to adapt to the many different environmental conditions on Earth during that time.
Morphological adaptations in a plant
• Stems instead of leaves:
• Wattles have adapted to dry regions by a dramatic reduction in leaf surface. In Acacia rigens, leaves are needle-like, thereby reducing water loss and contact with heat radiation.
• In many species, such as A. saligna, leaves are dramatically reduced. Instead, the flattened and widened leaf stems (called phyllodes) develop and function as ‘leaves.’ Stems have thickened cell walls and contain few stomata compared with a leaf. Thus, transpiration is reduced, and water is conserved.
• The witchetty bush (A. kempeana), is well-adapted to hot conditions. The surface of the phyllodes is leathery, thickened with cellulose, which reduces evaporation. In addition, the phyllodes are often held in a drooping position, which reduces the direct infra-red rays from the Sun.
• Sheoaks (Allocasuarina spp.) have a similar reduction of their leaves. The ‘leaves’ are actually leaf stems, bundled together. The true leaves are reduced to a tiny whorl around the beginning of each bundle of stems.
• Leaf texture:
• Leathery leaves, greyish green in colour, particularly quandong trees (Santalam acuminatum, have the outer layer thickened with cellulose.
• They may also have oil glands, such as Eucalyptus spp. An oily surface retains moisture.
• Thick leaves denote water storage in cell vacuoles of both leaf and leaf stem. (eg. cactus, Carpobrotus (kolbogo)
• Leaf colour:
• ‘Grey’ leaves have a surface of very tiny white ‘hair-like’ protuberances from the outer layer of the cell wall that act to reflect the Sun’s heat radiation.
• ‘Hairs’ on leaves (and some flowers) divert the passing of dry air over the surface, reducing evaporation (eg. hairy petals of Mulla mulla, of leaf and fruit of bush tomato, Solanum sp.)
• In addition, they create a microclimate of humidity trapped at the leaf surface.
• Leaf surface:
• Sclerophylly (or hard leaves) is the term used to describe leaves that are tough and rigid and usually have a very thick outside surface (cuticle).
• Leaf shape or no leaves at all!
• A broad leaf can be divided into sections, as in the Desert Kurrajong (Brachychiton gregorii). This formation breaks up the wide surface of a large leaf, effectively reducing the surface for transpiration.
• The Desert Kurrajong drops all its leaves in conditions of very high temperatures. As dry air passes over the leaves, transpiration may be greater than the tree’s ability to draw in water stored in the roots.
• Roots:
• The desert kurrajong (Brachychiton gregorii) and particularly those of mallee eucalypts, store water in enlarged vacuoles (spaces) in the root cells.
• This was well-known to Aboriginal people who dug up the roots, cut them open and ‘water flows freely from them.’(1)
Activity
Make a Leaf Catalogue:
1. Collect
• While On Country, each student collects leaves of various colour, texture, size, shape, and thickness, and stems (with or without bark). Make sure there is variety in the material gathered.
• Several leaves may be collected from the school garden for comparison
2. Classify
In the classroom, have students describe the shape (straight or curly), size (short, long, thin, flat), texture (soft, hardened, spiny) and the nature of the leaf’s surface (thickness, colour, presence or absence of hairs, oily).
3. Discuss how each characteristic (trait) adapts the leaf to survive in a particular habitat. These might include:
• region of low rainfall (aridity)
• area of extreme heat, such as northern and eastern Wheatbelt (aridity, high temperature)
• crowded with other plants and competing for sunlight (competition)
• growing in exposed and windy conditions (aridity)
• growing where they provide food for animals (insect predation)
4. Make the library
• Students draw and label each leaf, describing how it is adapted, and the selective force that has shaped it – lack of water (aridity), high temperatures, competition for sunlight, predation, etc.
• Collate each student’s contribution to provide a reference library for local plants.
Activity
Measure the Levels of Sclerophylly in Leaves:
In this activity, the hardness (sclerophylly) of the leaf is calculated from the weight of the leaf in comparison to a soft leaf.
MATERIALS
• Collect a bundle of hard leaves (bundle 1) from a eucalypt or banksia species
• Collect a bundle of soft leaves (bundle 2) from a garden or vegetable patch
• Balance
METHOD
1. Count the number of leaves in each bundle.
2. Measure the total area (i.e. length vs breadth) of a few leaves in each bundle, averaging the results.
3. Multiply the average area by the total number of leaves in each of the 2 bundles, (A1 and A2).
4. Weigh each bundle of leaves, (Mass1 and Mass2).
5. Calculate the level of sclerophylly in the leaves as the Mass divided by the total Area (g/cm^2).
6. Write up, comparing the levels of sclerophylly in the 2 plant types as evidence of a morphological adaptation to heat in the species examined (banksia, hakea).

Chaenopodiaceae
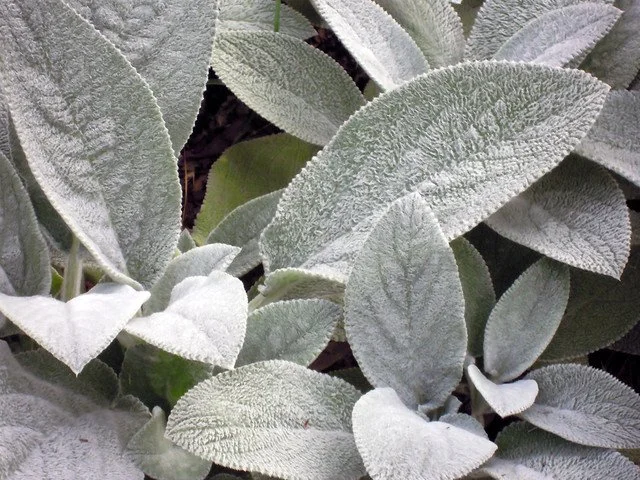
Silvery Leaves

Mulla mulla an Nungarin

Desert Kurrajong leaves
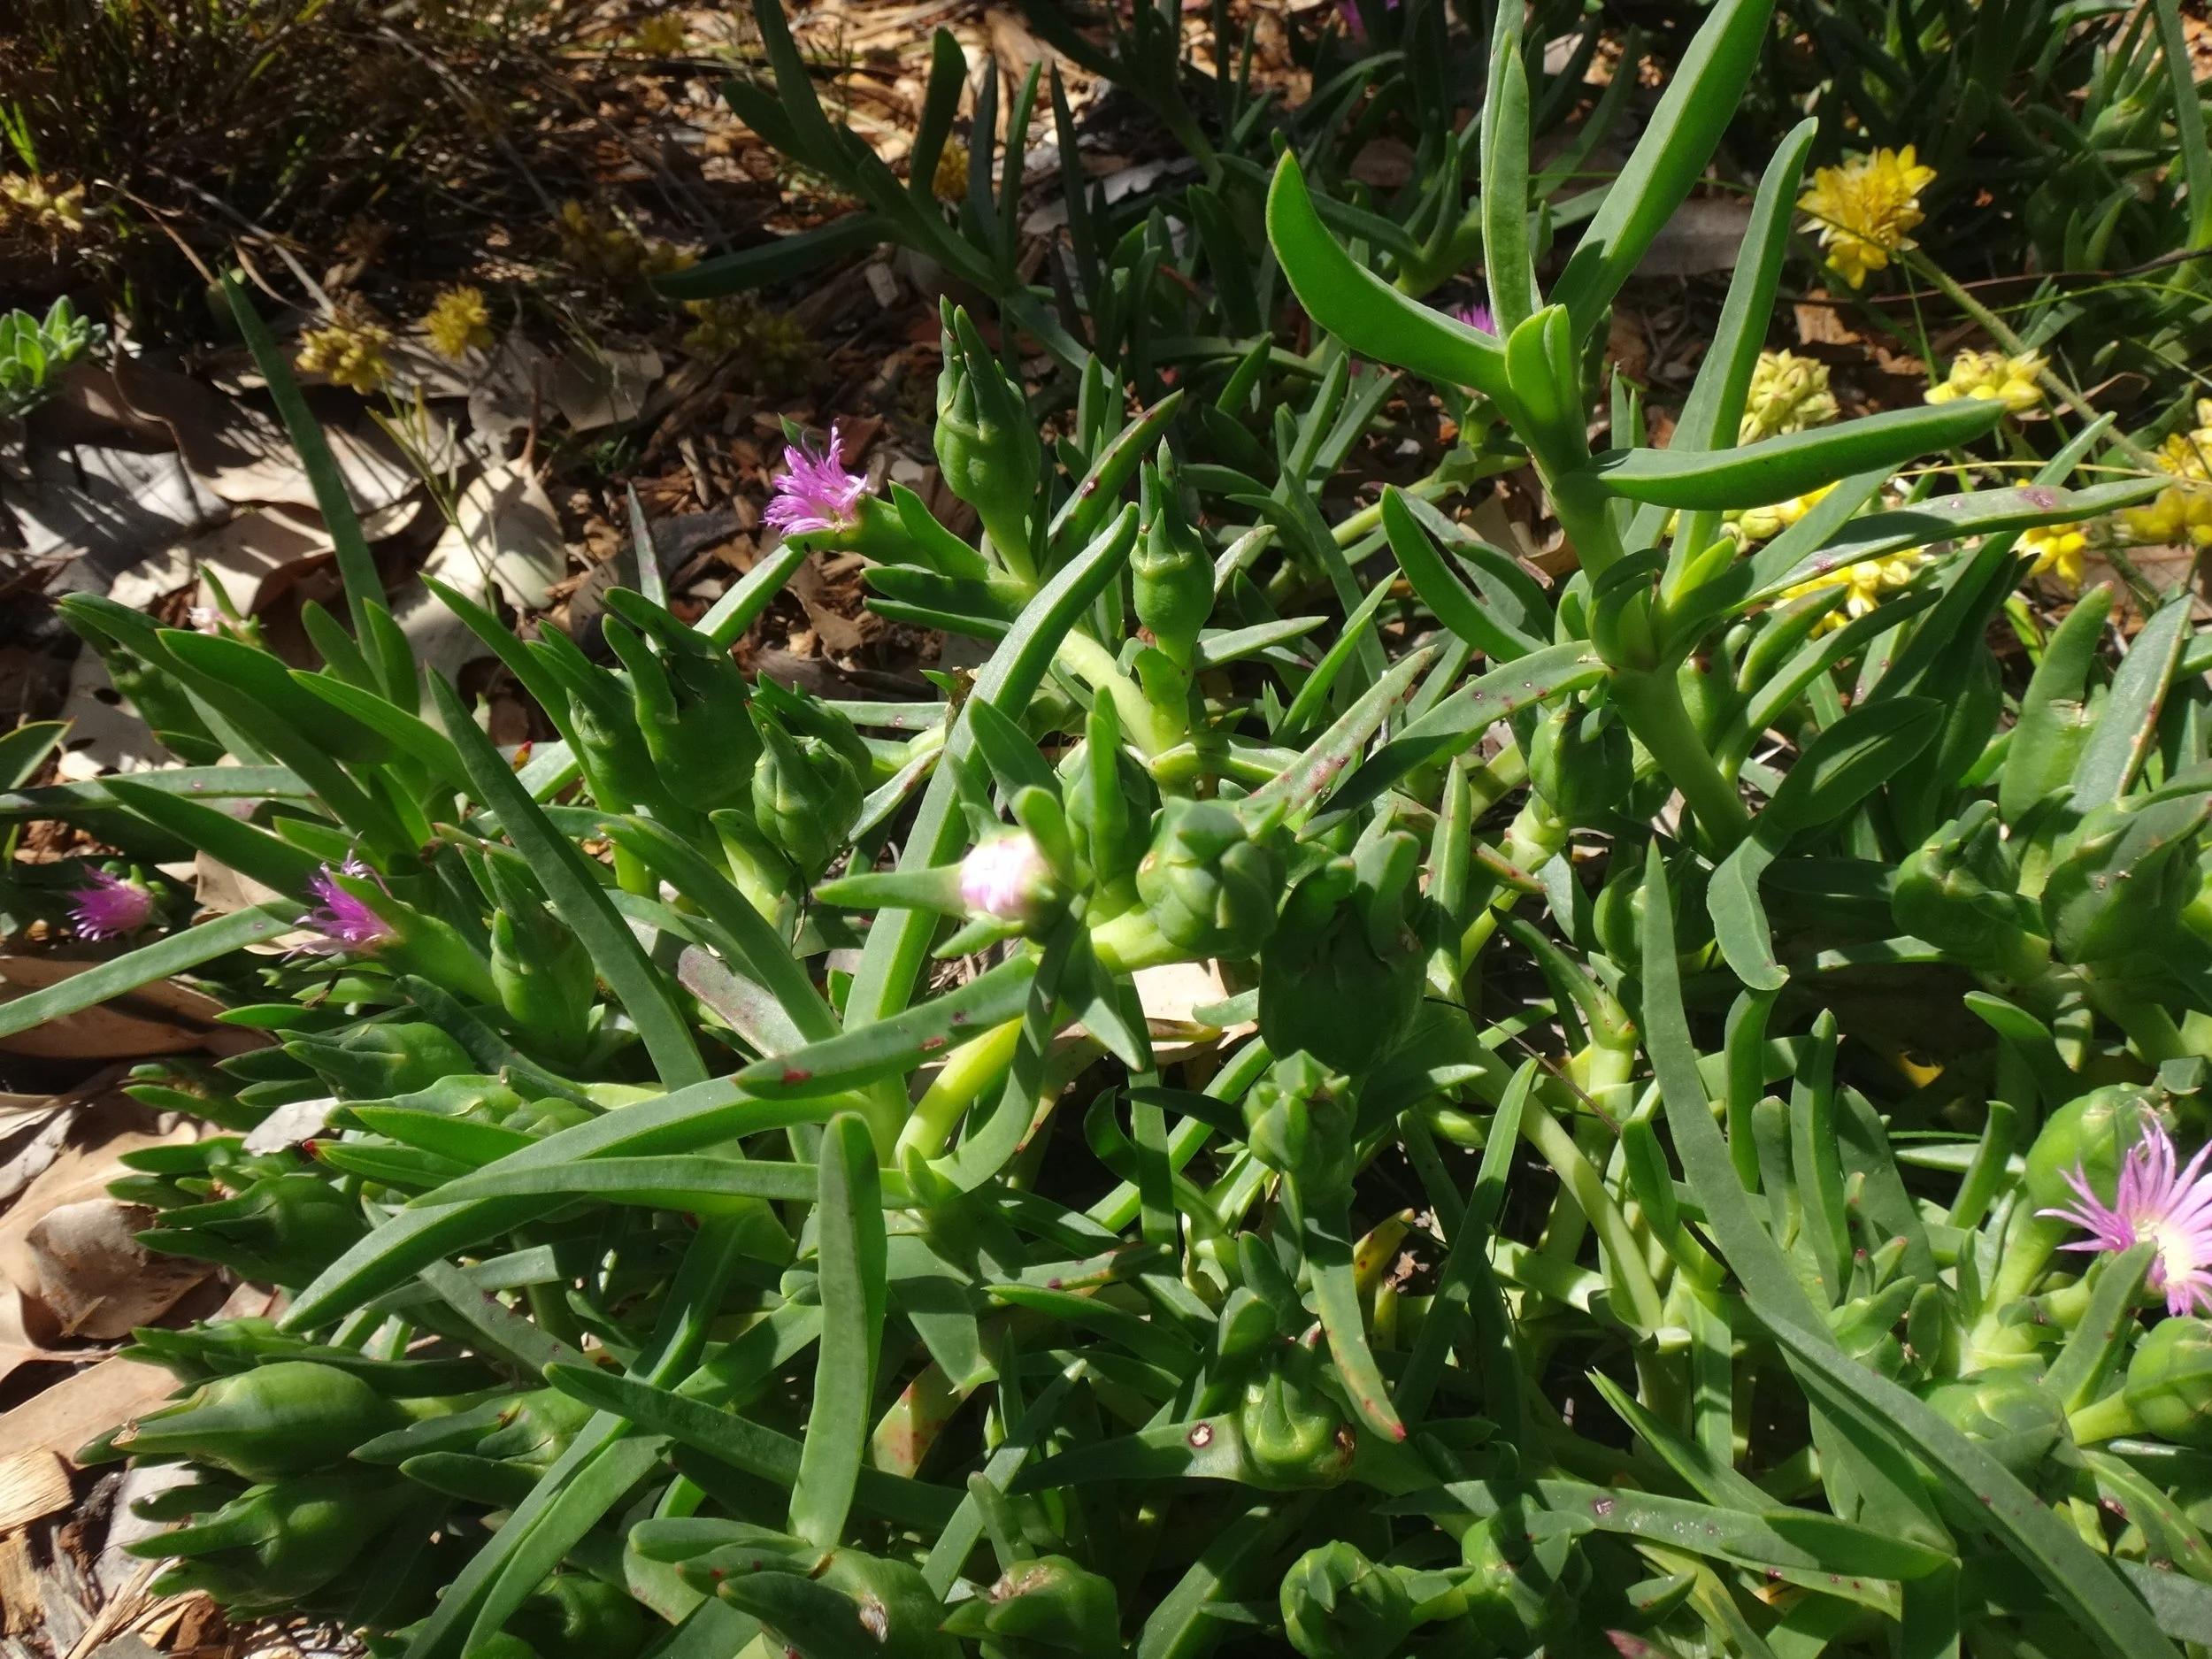
Carpobrotus modesta

Hairy seed pods

Hakea platysperma
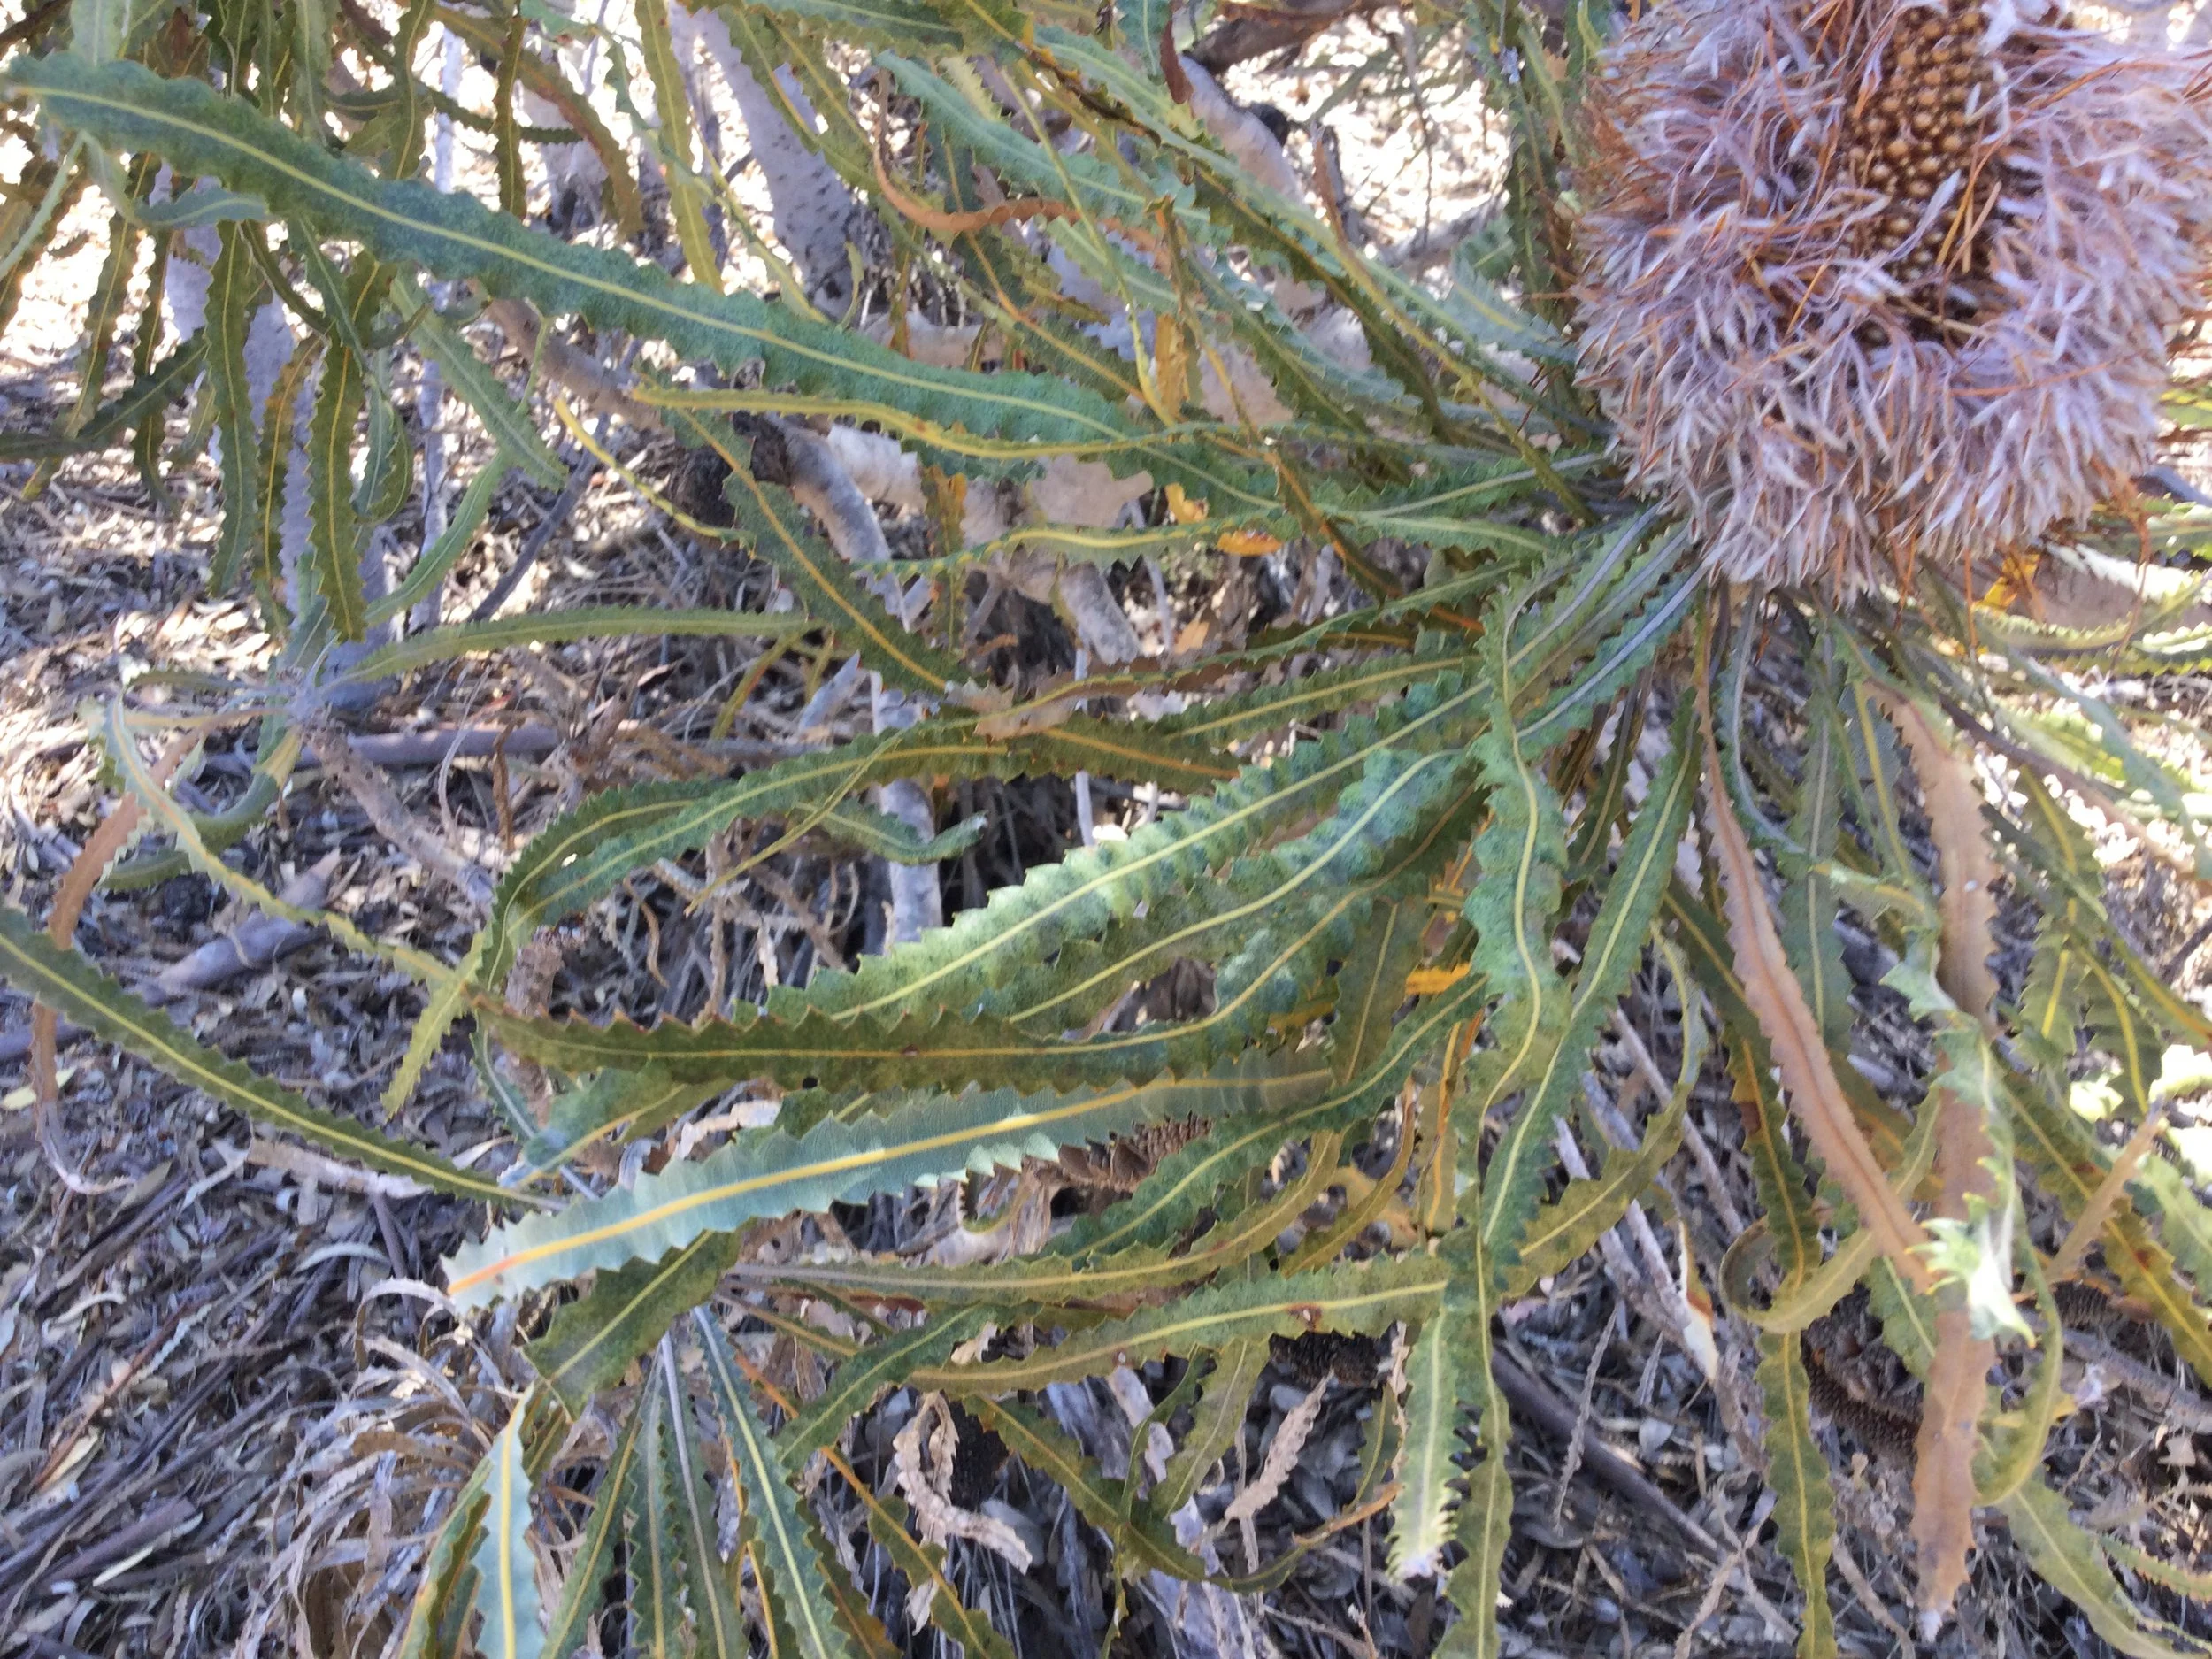
Banksia Leaves
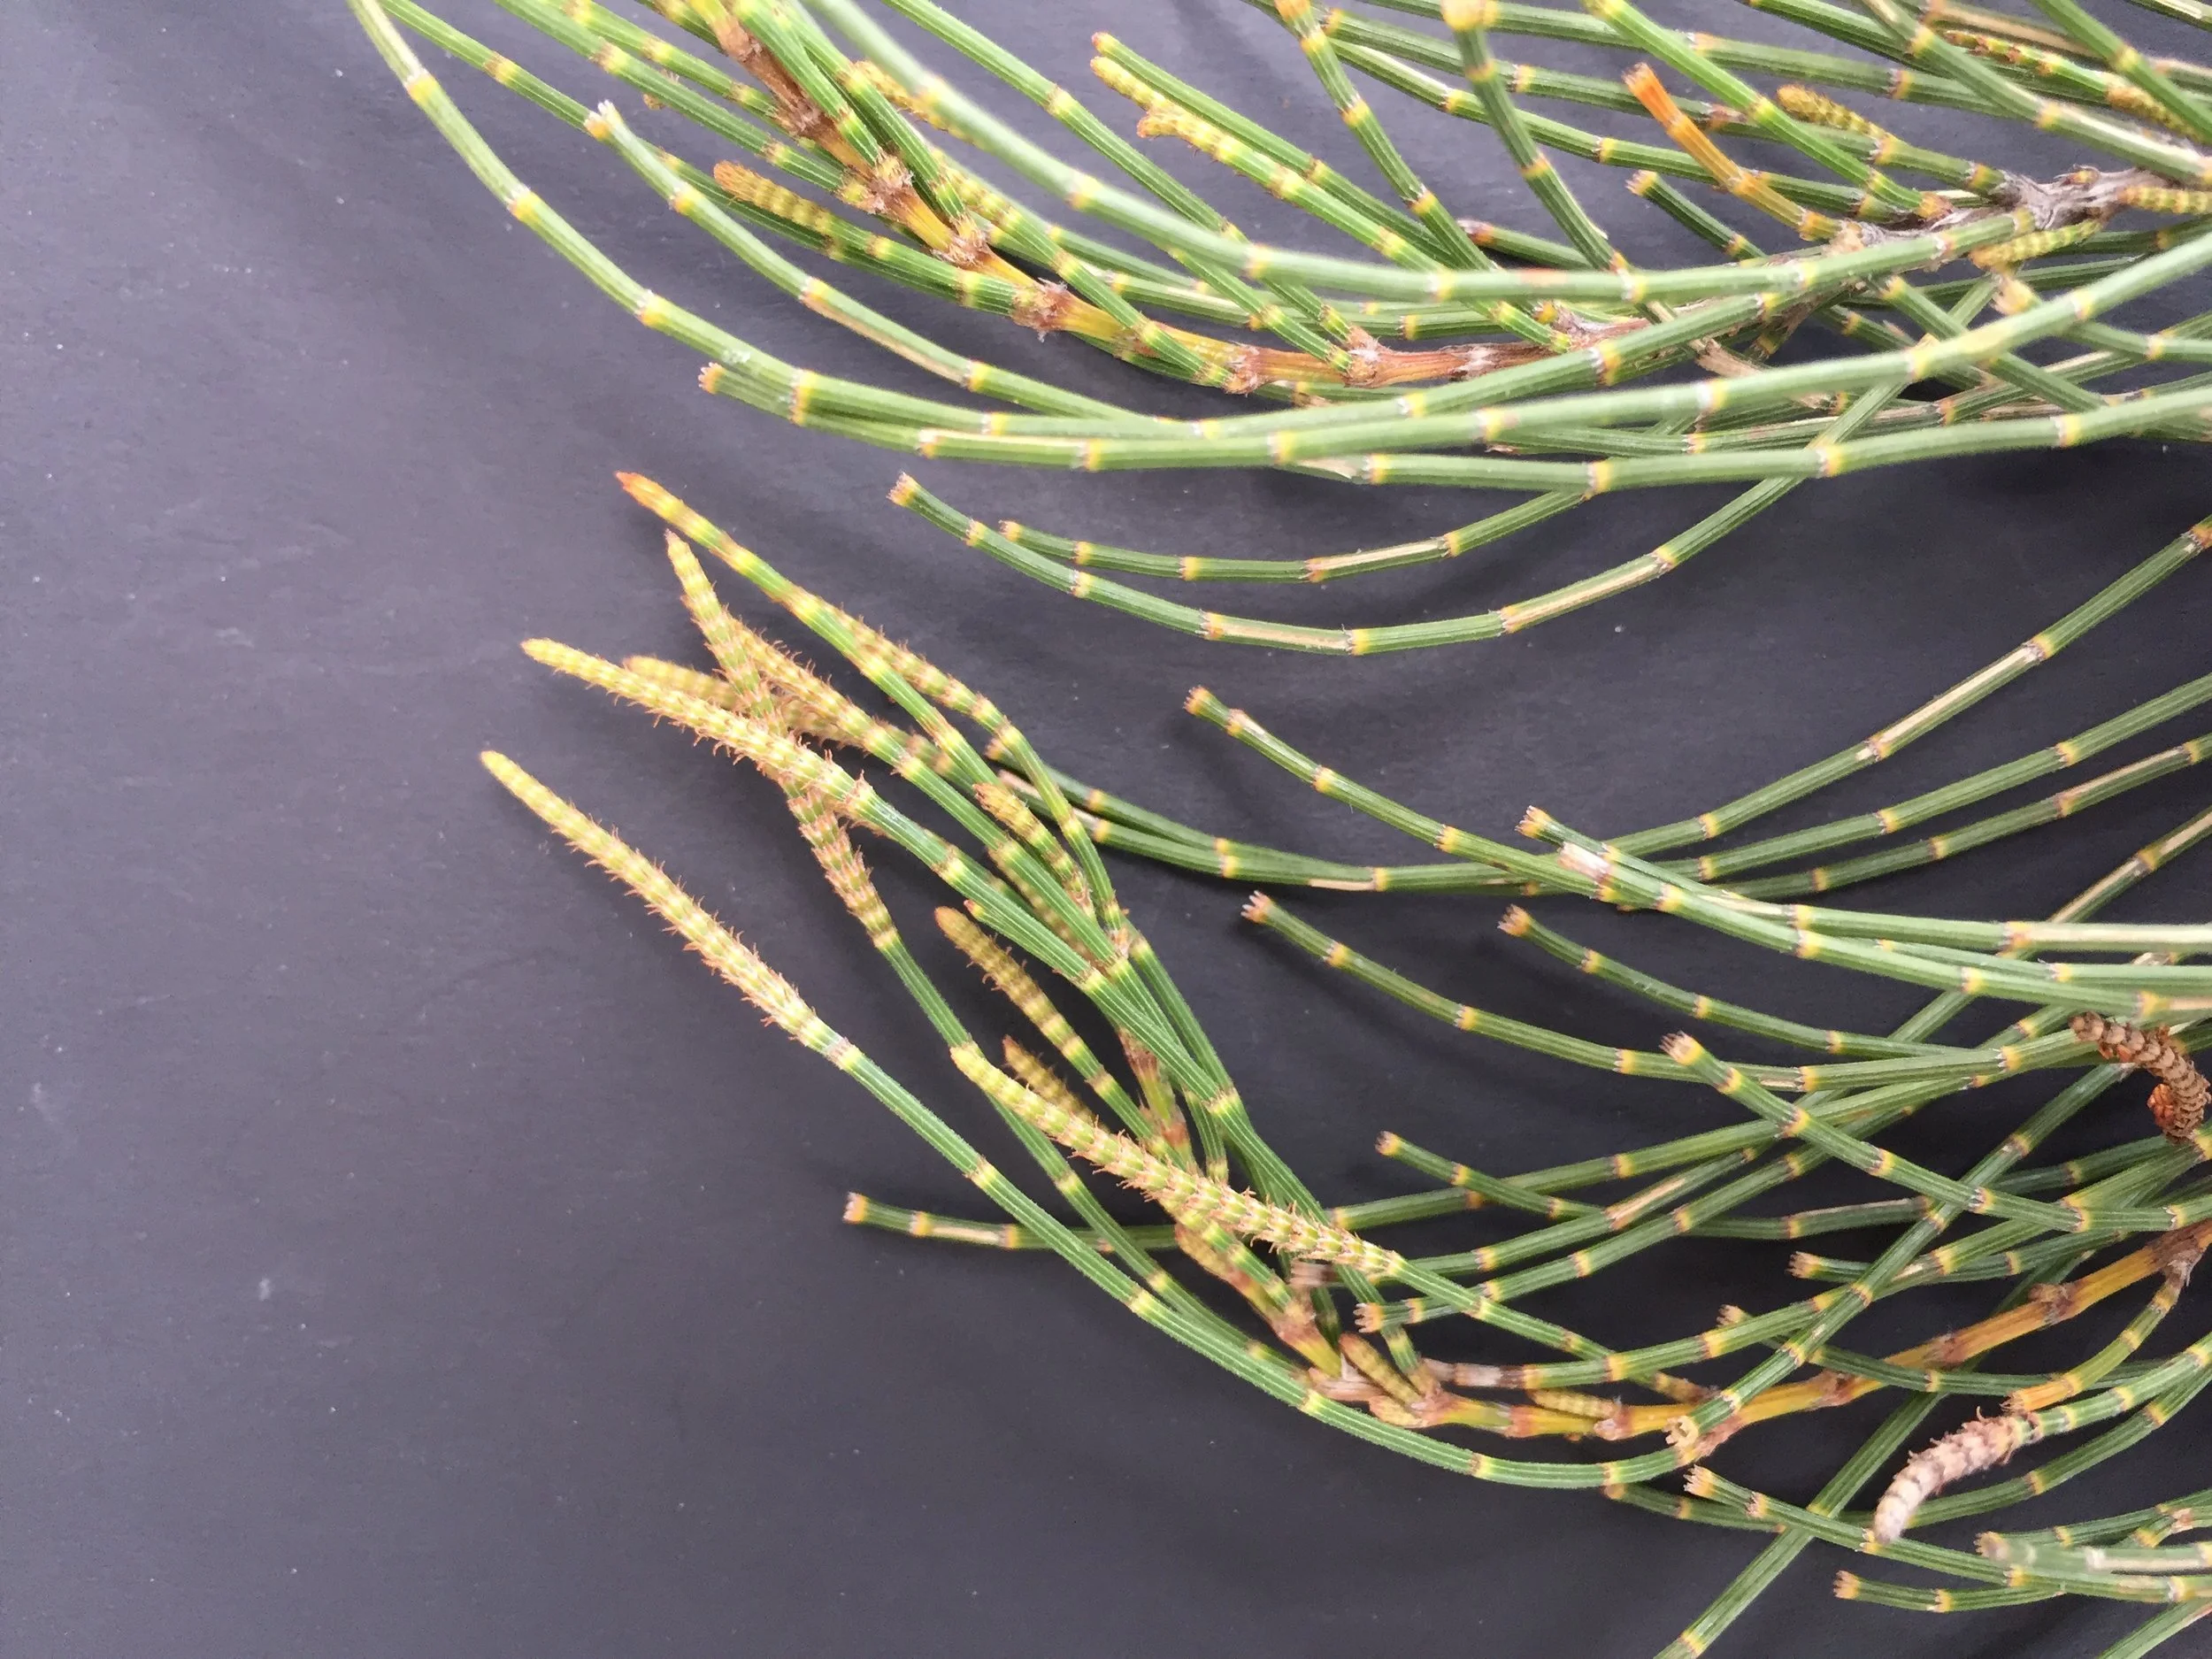
Sheoak leaves, Allocasuarina campestris
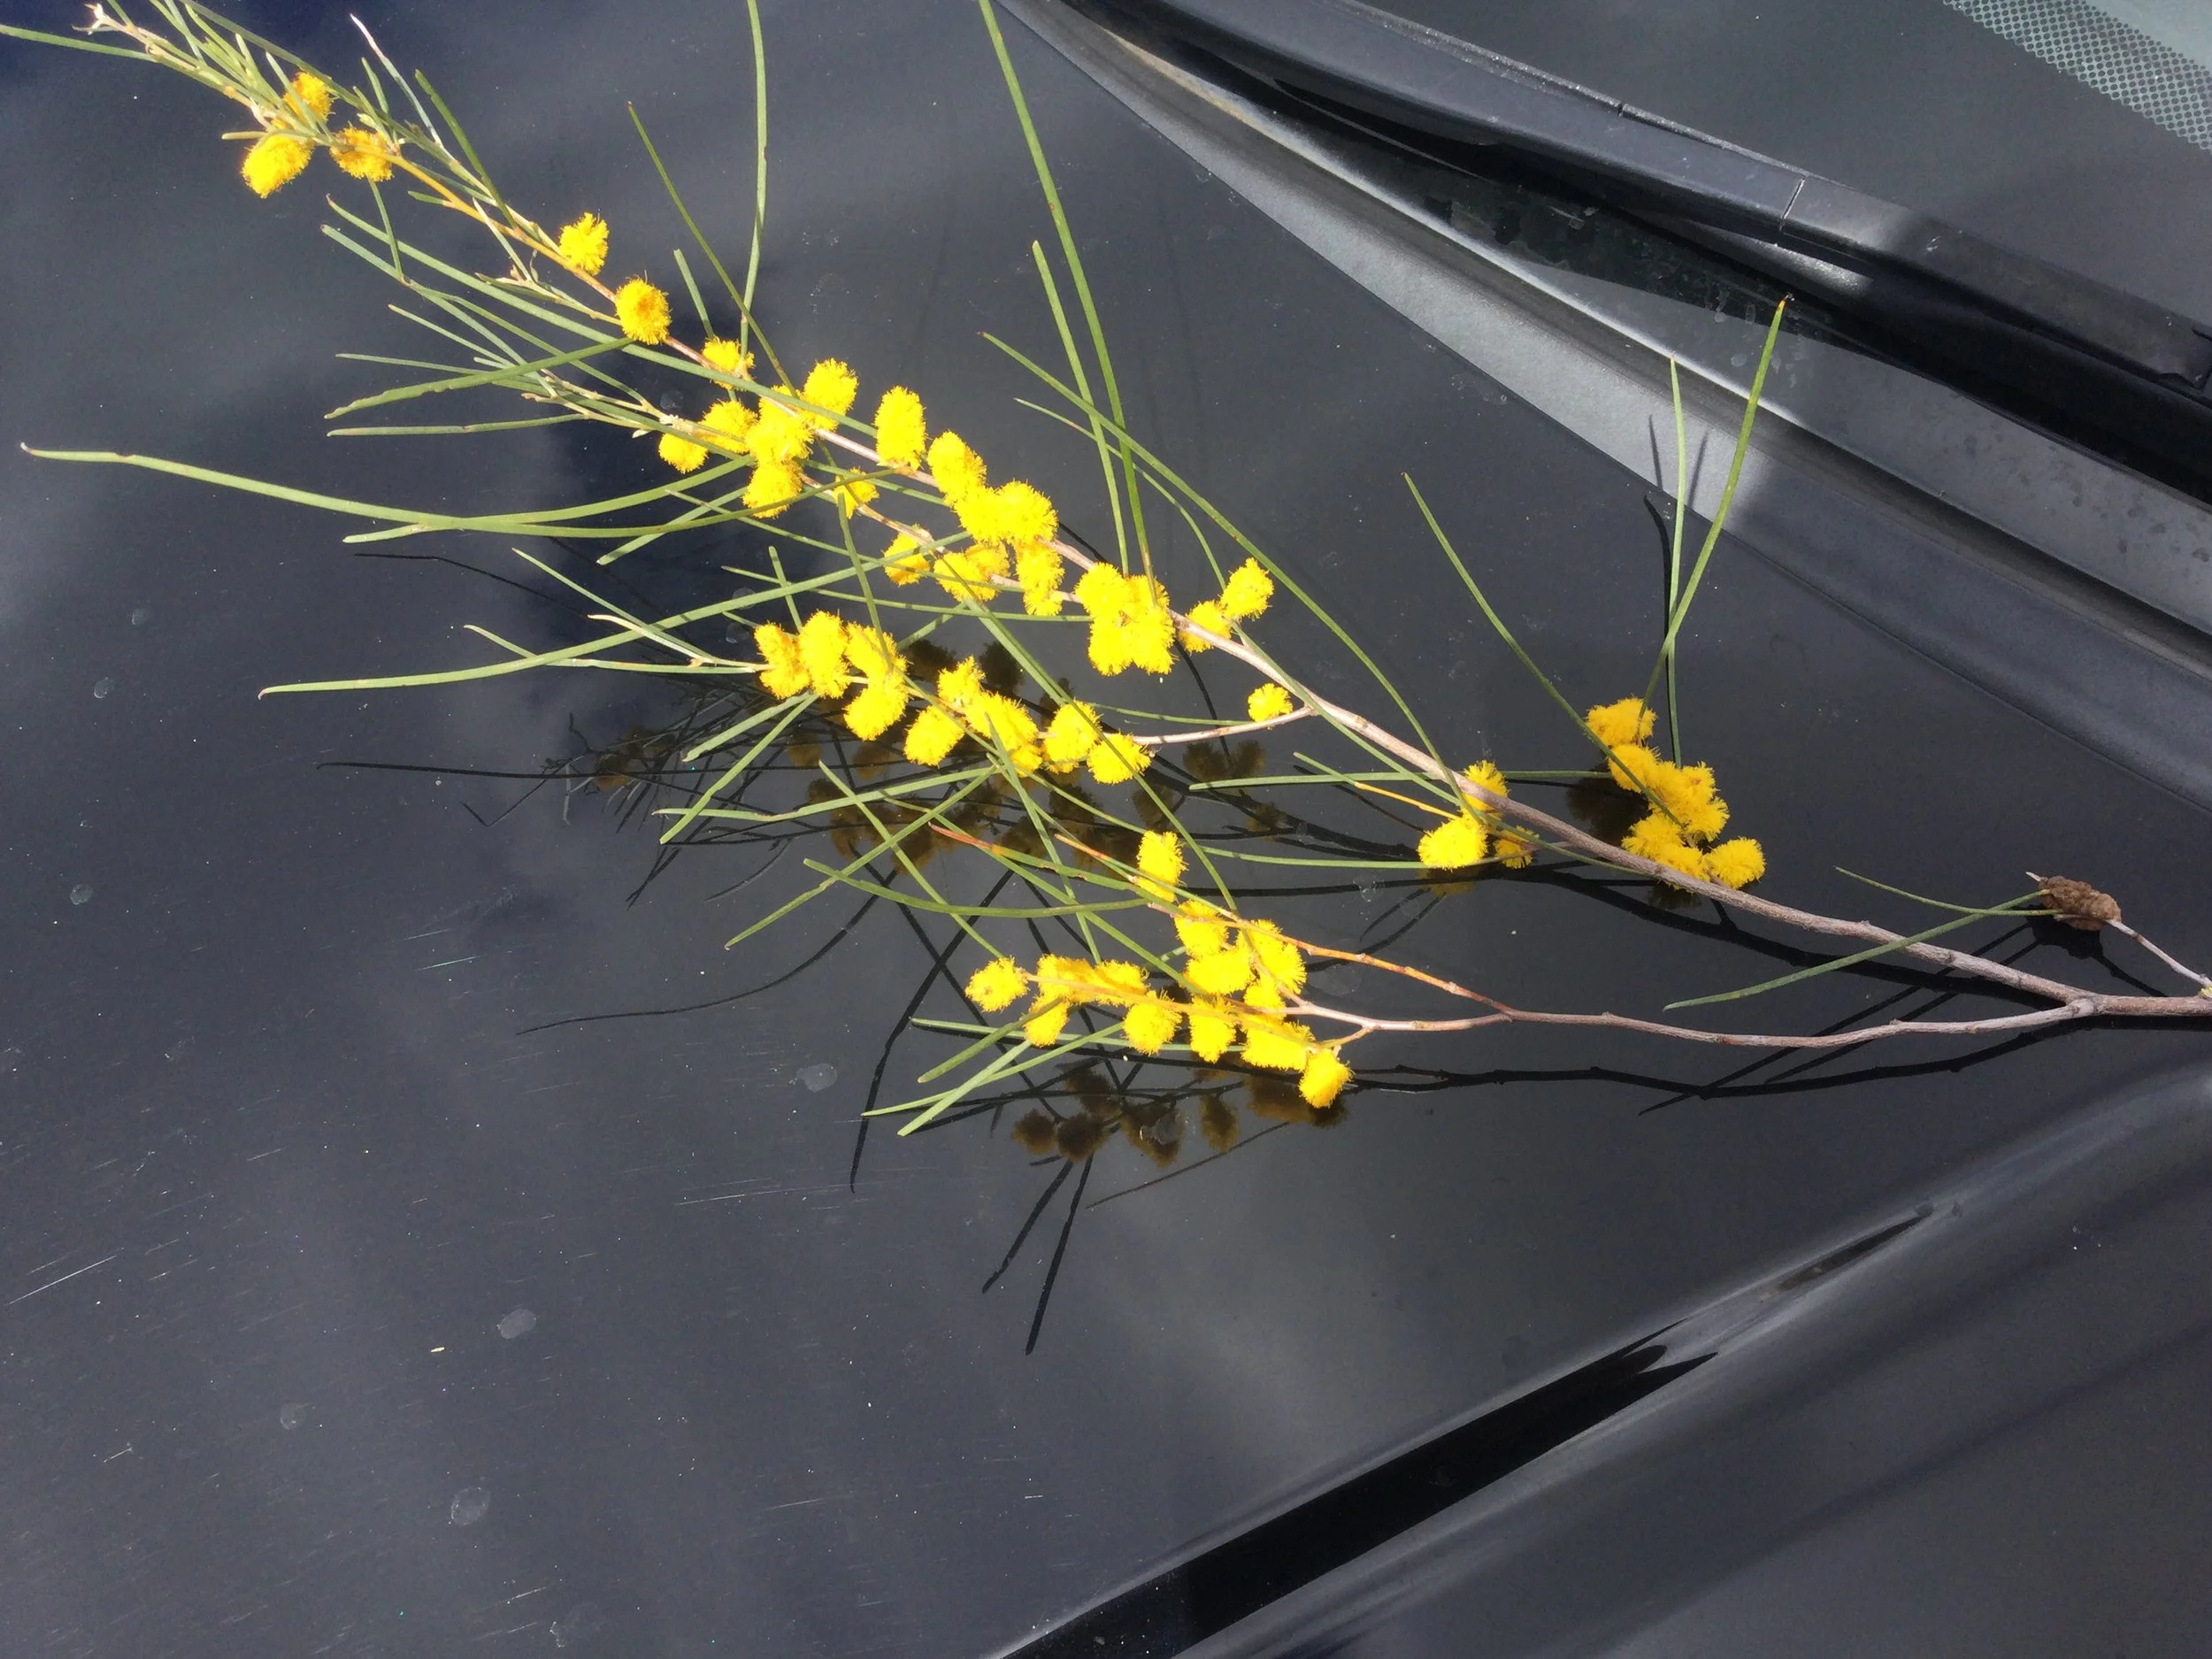
Wattle Leaves
How Water Moves in Animals
Animals are about 75% water(2). Water is vital for cellular and physiological functions, such as the regulation of body temperature, nutrient uptake into cells (circulatory systems), and, in vertebrate animals, the clearance of metabolic waste products in urine, such as urea and uric acid.
• Animals, with thin body walls such as frogs, worms, etc. gain water by osmosis occurring across the skin, and thus live in moist environments.
• Most land-dwelling vertebrates are protected by thickened outer coverings and gain water largely by drinking; but also from food they eat.
• These animals are also exposed to evaporation of water from their skin. Water exits through the pores of the skin (in humans), and across the tongue (in panting animals) as a vapour.
• The change in state, from a solid to a gas, requires energy, and this energy escapes as heat, cooling the animal. It is called the heat of vaporisation.
• Body scales and hair are protection from evaporation, but are not strictly an adaptation, rather they are pre-adaptations.
HOW A LIZARD DRINKS
The Mountain devil (Moloch horridus) arrived in Australia possibly 10 million years before other dragon lizards, and is found throughout the hottest regions of Australia (see distribution map). These lizards have remarkable adaptions to aridity; they are protected by thorny scales that are impervious to water. A Moloch is able to drink with a closed mouth, by standing (even with one leg) on a wet surface.
How did scientists find that out?
• Scientists placed a dehydrated (and weighed) lizard on a watery surface and noticed that its jaws were moving, as if it were swallowing. Indeed it was, as evidenced by a gain in weight. In some way, water had travelled up the body, and passed into the mouth. How does this happen?
• Similar to the capillary action in plant cells, the impermeable skin of the lizard contains channels between the scales that direct columns of water upwards from the puddle below and into the mouth.
• These scientists went further. They taped the jaws shut and placed the animal into water containing a dye. Tracing the movement of the water showed it passing upwards and into the closed mouth (although less than before.)
• Looking at the cells of the skin of the mouth revealed tiny spaces between the outer layer of the skin around the mouth, and from the spaces, even tinier ducts into the cells.(3)
So, with a closed mouth, and standing on a wet surface, the Mountain devil can rehydrate.
HOW A FROG SURVIVES IN THE DESERT
https://www.youtube.com/watch?v=XZazXPrFzWw
Frogs are tied to wet places. Their eggs are laid and fertilised in water. The larval stage, the tadpole, is aquatic, and only becomes terrestrial when it develops limbs and its adult physiological systems. On land, the frog’s skin is highly permeable to water. For a frog to live in arid regions, species have developed morphological (structural), physiological, and behavioural adaptations.
• Behavioural. They burrow. Rainfall can be brief, or even non-existent for many years in arid regions and these frogs stay underground for years. How do they survive a long dry period?
• Physiological. In the early stages underground (i) they can absorb water from the soil by osmosis, with the skin acting as a semi-permeable membrane.
• Morphological. They shed successive layers of skin (about one every 2.5 to 5 days) that stick together to form a thickened, impermeable outside layer, or cocoon. This prevents the frog from drying out, (or desiccating), keeping it moist (hydrated). The mouth is also covered, so the frog does not ingest food while burrowed.
• Physiological. While cocooned, their rate of metabolism is very reduced. Metabolising food produces urine, which is stored in the bladder. Urine contains solutes and the waste product urea, which creates an osmotic gradient between the frog’s tissues and the outside water, a physiological adaptation to retain water in the body.
• Morphological. Burrowing frogs hasten the larval stage to take advantage of a short wet period. In wet habitats, a tadpole develops into a frog in 120 to 160 days. In a burrowing desert-adapted frog this process takes 16 to 40 days.
How do frogs know when to dig their way to the surface?
Scientists have not yet discovered the precise stimulus for the frog to dig itself out into the open, but suspect that a fall in barometric pressure, indicating onset of rain, may be detected by the burrowed frog(4).
In summary, adaptations shown by desert frogs may be classified as
i. Structural (or Morphological) – retaining skin layers as a cocoon, and accelerated larval development.
ii. Behavioural – by burrowing and by habitat selection (sand or clay).
iii. Physiological – by storing water in the bladder and absorbing water from the soil by osmosis.
https://www.uwa.edu.au/study/-/media/Faculties/Science/Docs/Worksheet-Waterholding-frog.pdf
HOW THE EGGS OF AN AQUATIC INSECT SURVIVE WITH NO WATER
Cryptobiosis in a non-biting midge (Tanytarsus sp.) https://bie.ala.org.au/species/
• Non-biting midge flies, or chironomids, commonly occur in both inland freshwater and coastal areas. They are commonly known as “blind mosquitoes” because they are mosquito-like in appearance, but do not bite. They are also called “fuzzy bills” because of the male’s bushy antennae.
• This midge species occurs across Australia and is found in swift moving streams, deep slow moving rivers, stagnant ditches, and in lakes and ponds that are rich in decomposing organic matter. It has been documented as an ‘indicator species’ for water quality (see Module Year 8).
• The midge’s life cycle includes egg, larval, and pupal phases that are all aquatic and form a significant part of the food chain in inland waters. When the winged adult emerges from the water, it lives for a short 3 to 5 days – just long enough to mate and develop about 1000 eggs! These are laid in shallow water, on the edge of inland rock pools or the edge of streams.
• Of the several adaptations in this life cycle, one that is remarkable is a form of cryptobiosis. Cryptobiosis is a state of extreme physiological inactivity in response to adverse environmental conditions. In the cryptobiotic state, all metabolic activity stops, preventing reproduction, development, and repair.
• For the midge, cryptobiosis involves a shut-down of the metabolic activity in the eggs – they lose all their water (dehydrate) and remain dried out (or desiccated) for long periods. They are brought back to life when their environment becomes moist. Water enters the eggs and revives the metabolic process of living. This is best described as a physiological adaptation.
Activity
Observe Rehydration in a Midge from a Local Water:
AIM
To demonstrate cryptobiosis, a physiological adaptation to aridity in the non-biting midge.
METHOD
1. Students, or the teacher, use a scraper to collect a sample of dried mud from the edge of a granite outcrop, or a stream. The sample should be large enough for each student to have approx. 2 cm2.
2. In the science room, each student (or pair) places a sample in a Petri dish. (Equipment in TOOLBOX).
3. Moisten the sample with about 10ml tap water, and mix gently, stirring with a glass rod, and cover. Non-biting midge Midge lifecycle Midge larva
4. Stand for 1 hour and observe under low power (X4) or (X10).
5. Look for the larval form of the midge. (5-10 mm). It is red in colour, due to the presence of haemoglobin. This is an iron-containing molecule, present in higher vertebrate blood that carries oxygen throughout the body.
6. Record presence or absence of midge larvae.
7. If absent, let stand a further hour, repeat Step 4, and record as before.
8. Depending on the presence of dehydrated invertebrates, rehydration may take up to 3 hours – so don’t give up!
9. Write up your experiment - introduce the animal, describe its life cycle, how it has adapted, the time taken for rehydration, and the environmental conditions to which it is adapted.